Pages

Showing posts with label crafting. Show all posts

Monday, June 10, 2013

Simple Summer Burlap Wreath

I have been spending a lot of time working in our yard, and improving our home’s curb appeal.  And of course my awesome hubby has been helping out with the yard work.  We have been trimming, weeding, planting shrubs, and adding potted flowers.  I love the new look of our outdoor entryway.  I think that the new container garden that I created gives a very welcoming feeling and a colorful appeal.


n effort to dress up our front door.  I decided to make a wreath to place on the door, something that would reflect my own personal style.  I created a entire board on pinterest dedicated to wreaths.  Here is the link;  Wreaths.


First off, I did what any excellent crafter would do.  I took a trip to Hobby Lobby.  I should say a short trip to Hobby Lobby, a new store just opened only a short ten minute trip from our house.  Gotta love that!


DIY Simply Summer Burlap Wreath

What You Need:
A Spool of Burlap
A Styrofoam Wreath
Hot Glue Gun and Glue Sticks
Wire and Wire Cutters
Floral Embellishments

Step One:
I wrapped the burlap around the styrofoam wreath, securing it with hot glue.
Step Two:
I twisted up a wire loop, poked it into the top of the back of the wreath, and secured it with  hot glue.
Step Three:
I decorated the front of the wreath, hot gluing on colorful daisies and green leafy accents.
Step Four:
I proudly hung it on our front door. ;o)


Our front door is officially ready for Summer!
Do you have a summer wreath on your front door?
Smiles, Paula


{ Follow Me On Pinterest } Paula Parrish

Monday, July 23, 2012

{ guest blog post }


I am super excited to introduce you to Helen a talented craft diva from Blue Eyed Beauty.
She has agreed to sharing with us her tutorial on how to make a "Denim Flower".
I love this green and thrifty craft project.
Creating a denim flower from an old pair of jeans, no trip to the store required for this project. Love That! I am planning to make a few of these flowers, one for my hair and another to embellish my handbag.
Take it away Helen . . .
DIY Denim Flower
I decided to use the bits of scraps left over from my Layered Denim Skirt to make a flower to wear in my hair when I wear my skirt. This is the second fabric flower I have ever made (my first one was a different style which I am still perfecting).

What You Need:
8-9 pieces of fabric, cut in circle shapes, a hot glue gun, a large needle, and a bobby pin.

1. Taking the large needle and one of the circle pieces, poke the needle through. Insert the top part of the bobby pin. For each circle repeat this process until they are all done.

2. Fold the circle in half.

3. Fold in half again. Cut off the point at the bottom.

3. Scrunch the fabric. Make it more or less ruffly as you want it.

4. Hot glue in between each fold near the bottom piece that was cut out.

5. Put a good size glob of hot glue on the circle piece around the bobby pin. Work quickly to press the flower petal piece down in the glue to get it secured.
6. When you get the whole flower put together, use little bits of hot glue to secure the flower all the way down.
7. To add the sparkles, use a dot of hot glue and quickly press the sparkle into the glue. Add as many as you want. I only added a few to mine.
Now your flower is done!
Enjoy wearing it with any outfit you want.
The nice thing about the bobby pin is you can put it in anything!

Thanks Helen for sharing this awesome tutorial with us. ;o)
This is a great project to make with the kids. It’s also a great way to give kids a lesson in the importance of reducing, reusing, and recycling while keeping them busy this summer.
Smiles, Paula

Thursday, February 2, 2012

{valentine’s lavender sachet}

Oo-la-la! I am super excited to share a project with you that
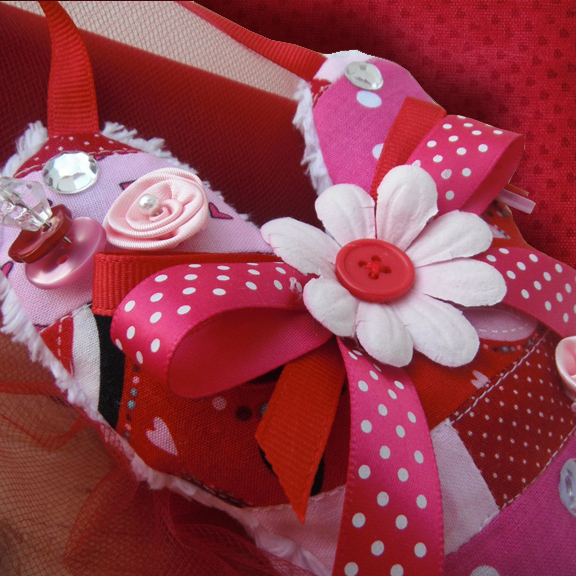
I just completed for Valentine’s Day, a heavenly lavender heart sachet.
My entire home now has the sweet, intoxicating scent of lavender.
I am sharing my Valentine’s Lavender Sachet tutorial with you!
 
Woo-Who! Let’s get busy.
Cut scrap fabric strips into various sizes from 1”, 1 ½”, 1 ¾” tall x 8 wide.
Quilt the pieces together into a fun pattern to create a square roughly 8” x 10”.
Download Pattern.
Here!
Select a fabric for the back of your sachet, I used a white fluffy chenille.
Cut the front and back of your fabric into the heart shape from the pattern.
The hearts should be 6 ¼” wide x 8 ½” tall.
Cut a red ribbon 11 inches long.
Pin to the right side of the fabric, then sew
a small stitch at the top to tack into place and remove pins.
Pin the hearts together with the right sides in and sew leaving a
2” opening on the left bottom side for filling with lavender buds.
Turn your heart right side out and fill with lavender buds.
Stitch the side closed and embellish your heart with
buttons, ribbon, pins and flowers.
Whaa-laa! Done! Finished!
 
Happy Valentines Day!
Smiles, Paula
Thanks so much for stopping by and visiting my blog.